Tuesday, February 28, 2012

Sweet Banana Chips

Being 25 weeks pregnant and home all day I have come to realize that I snack ... a lot. Trying to eat healthy snacks and maintain a good and healthy weight while pregnant can be difficult especially when you have a  pantry full of snack foods . So while cleaning the kitchen this morning and throwing out the old food I found some slightly over ripe bananas .

I didn't want to toss them I mean I bought them beacuse they are good for me and I am supposed to be eating fruits right? Right, but wasn't sure what to make with them. After a little research I though I would try to make banana chips.They seem like the perfect thing to try and a healthier alternative to the potato chips and oreo brownies staring at me. I read a few recipes and how to's online but no one recipe seemed just right or was exactly what I was looking for so I made up my own as I went adding pieces from everything I had read.

I started by peeling and slicing my bananas pretty thin and laying them out on a paper plate.
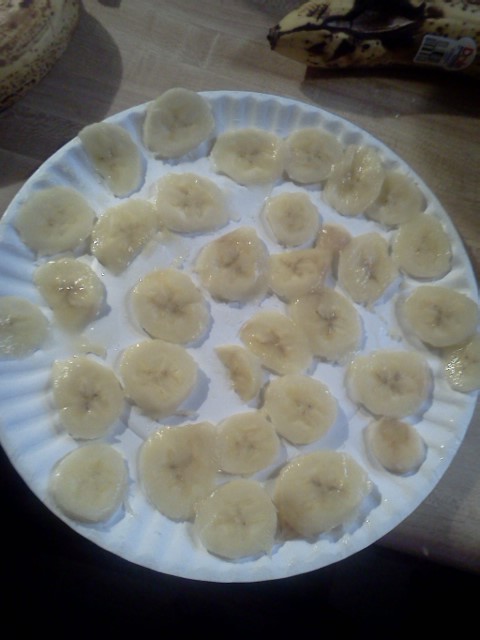
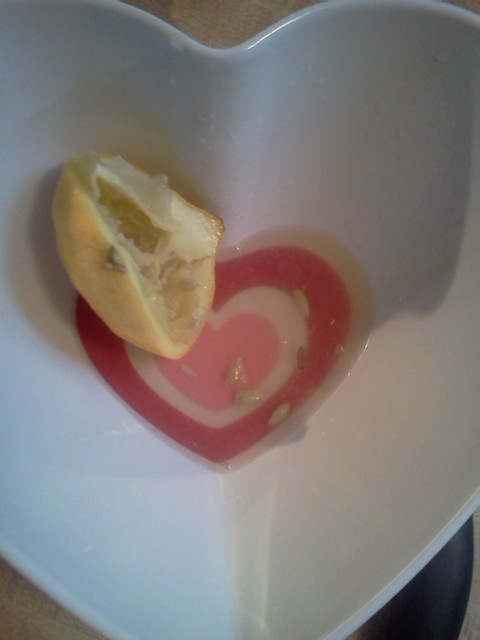
I didn't want them to turn brown while I was cutting up the rest of them so I lightly coated them in some fresh lemon juice.

Now I was wanting something sweet that I could snack on so I decided to make a simple syrup to put on them. Recipe as follows.

• 1/4 cups water
• 1/2 tsp vanilla extract
• a pinch of ground cinnamon
• and 1 1/2 Tbs sugar

Mix all ingredients together in a small skillet on med/med-hi heat until sugar is dissolved and the mixture has come to a slight simmer . Them remove from heat and set aside. This make a small amount but it was more than enough for two bananas. 


Next I took a 9x13 baking dish and very very lightly drizzled some Extra virgin olive oil into it. Now you can use a cookie sheet but mine tends to burn the bottom of things and my baking dish is new and therefore the non-stick coating works better :)

I then laid out all my banana slices in the baking dish in a single layer as close together as I could without allowing them to touch and took the simple syrup and drizzled it on top of them. I used the back of the spoon to make sure they were completely coated.

Now most place that I looked up said to cook the bananas at 200 degrees for about an hour in a half. Well when I checked on my bananas after an hour they still looked an felt like the fresh bananas I had put in the oven, so even though your apparently not supposed to I turned up the heat to 250 degrees. After another 45 mins I was much more happy with the results I was getting. They were starting to dehydrate some and turning a very light golden brown so I decided it was time to flip them over.

I put the rest of the syrup on the other side of them and put them back in the oven. After another 45 mins they were a deep golden brow and only slightly pliable in the very center. I then let them dry and cool for about 30-45 mins and this was the result.
Delicious sweet golden banana chips . I must say that I absolutely love these !!!!! They are sweet and crunchy with just a slight chew to them. They are the best snacking food . Bananas will never go to waste again in this house. I will probably double or triple the recipe next time as all the ones I made today are just about gone :) Layla loves them as well which I am thrilled about because I have a hard time getting her to eat bananas. Over all I am very very pleased with the finished chips.

Paper Mache Letters

Today project is Paper Mache Letters. I wanted to hang my daughters' names on their wall but at around 5 bucks a letter ( for the wooden ones ) 55 bucks. Hmmmm I can make them for way cheaper :) plus I didn't really care for the fonts , this way I could pick whatever I wanted  . So I got to work.

First I found the font I wanted and blew it up on my laptop screen and just traced the letters I needed on some notebook paper and cut out all my letters .


Then I got out all my old stale cereal and cut open the boxes and traced my letter on to the cardboard 2 of each so I had a front and back to my letters and carefully cut all those out so they matched up . Then I cut out a bunch of 1in wide strips out of my leftover cardboard.

 Now the tricky part. I had to take the strips and tape them to the top and bottom of my letters to create a 3 dimensional letter. Phewww . Once I was done with that ( It took quite awhile and a good bit of tape) it was time to paper mache.


 I didn't have newspaper around but I did have some old phone books :) . The whole thing took some time but you make your paper mache ( flour water and salt )  cut out your strips of paper, dip them in your mixture and smooth of the excess with your fingers and wrap each letter . I didn't have the patience to let them air dry so I put them on a cookie sheet and placed them in a 200 degree oven . It takes about 10-15 on each side for them to be completely dry and you want to make sure they are because moisture trapped inside between the letters can cause mildew and make them fall apart over time. This would be quite depressing with the time that goes into them. I repeated this ( covering in paper mache and baking to dry )  about four times until the were hard and felt comfortable with them . Now these were not perfect their are lots of curves around each letter and their is no way to keep the paper from crinkling over each other in the curves. But I used some fine grain sandpaper and got out what I could with out damaging the integrity of the letters and I was fine with the slight textured look. I didn't take pictures of these steps because it was far to messy :)

Now the fun part :) decorating them . I decided to go with spray paint but anything would be fine ( ohh ohhh ohhh covering them with fabric would be so cute also ). Now at this point I was going to cut out some wallpaper border and put it on the front but I decide to do their fan that way instead and didn't want to go over board with making everything look the same. So I painted them pink and cut out a few of the objects from the wallpaper and hot glued them on.
 Then I took the trim that was at the top of the border and glued it around the edges of every other letter.


The last step was gluing on some ribbon to hang them from. I must say I really like how they turned out but I am so glad this project is finished as it was painstakingly time consuming  .

Monday, January 16, 2012

Diy ceiling fan for kids room.

This is my first blog and post so forgive me for the lack of know how and photos with this post. I promise to get better at this.

I am expecting my second daughter in June and since I have everything ( clothes, blankets etc. ) saved from my first daughter who is 17 months it has left me with a void in the nesting and spending area when it comes to getting things ready for her. So I decide to add to their room ( they will be sharing) . Wall hangings, decals, and just some over all fun and cute details to their room.

While browsing eBay a few days ago I came across the cutes ceiling fan that was done in the same design as their room ( CoCalo Angelica ) . This is a now discontinued line from them and it has been a challenge trying to find things that match it. So when I seen this .... Well I really wanted it! The down side 95.00  ! Ouch ! Well I went to Walmart and found a white ceiling fan for 22.00 ( much better price right !) But yet it was so plain in comparison . Then it hit me! I went scrounging around in their room till I found it. The left over border from their room ! With the ceiling fan, border, and mod podge ( homemade of course 8 bucks for something I can make for 1.50 I don't think so ) in tow I headed to my work station .


I busted the box open and pulled out the fan blades . This fan had solid white fan blades that were reversible to a white wash. I decided that I would cover the white washed side since I didn't care for it much and If I ever wanted to change the fan back to white that side would still be there. I un-rolled the border and laid the fan blade down on it and traced the blade onto the back side on the border. I did this four more times and then slow carefully and very patiently cute out my fan blade shapes. Once I had all four of them done I coated the fan blade in my mod podge and then coated the wallpaper border with water to activate the built in glue then folded it over onto itself and rubbed to two wet sides together ( this is supposed to help the glue activate and stick better . Not sure if it does as I have never tried it without doing this step but I will telling that the border has never come loose anywhere in her room or the fan blades even with it one high ) . I unfolded the border and carefully placed it on the fan blade. You will have A little bit of play with the glue so move the border around until you have it just right on your blade. Then I smoothed out all the air bubbles (just gently push and rub on them till you get them to the edge) . I then flipped the blade over and trimmed off the little pieces of paper that were sticking out with a well I would suggest an exacto knife but  mine went missing so I used a push pin in the same way lol  . When I was satisfied with the way the blade looked I took a paint brush and cover the blade and border with mod podge I set it aside and did the same thing with the other 3 blades. When the were dry ( I waited about an hour , I'm sure they were dry before this but I didn't want to take any chances ) I screwed on the blade arms ( the things that attach the blades to the fan itself ) .

Then came the task of taking down the old fan and hanging the new one..... I don't want to re-live that experience so soon so we wont go into all the details but. I did it !!!!!! Old fan out new cute matching fan in !!!


Total cost :
1 42in white fan = 22.00
1 bottle of Elmer's glue ( for homemade mod podge ) = 1.50
left over border ? Well not sure but the whole roll was 1.30 so will just say that :) = 1.30
Total 24.80!!!!!!!!!!